Introducing APStreamline!
17 Aug 2018Download APSync with APStreamline built in from here (BETA)!
I'm very excited to announce the release of a network adaptive video streaming solution for ArduPilot!
Links to the code
About
The APSync project currently offers a basic video streaming solution for the Raspberry Pi camera. APStreamline aims to complement this project by adding several useful features:
-
Automatic quality selection based on bandwidth and packet loss estimates
-
Selection of network interfaces to stream the video
-
Options to record the live-streamed video feed to the companion computer
-
Manual control over resolution and framerates
-
Multiple camera support using RTSP
-
Hardware-accelerated H.264 encoding for the Raspberry Pi
-
Camera settings configurable through the APWeb GUI
I'm chuffed to say that this has not only met the requirements for the GSoC project but has also covered the stretch goals I had outlined in my proposal!
Streaming video from robots is an interesting problem. There are several different use cases – you might be a marine biologist with a snazzy BlueROV equipped with several cameras or a UAV enthusiast with the itch of flying FPV. APStreamline caters to these and several other use cases.
While APStreamline works on the all network interfaces available on the Companion Computer (CC), its main value lies in the case of streaming on unreliable networks such as Wi-Fi as in most cases, we use the Companion Computer (CC) in Wi-Fi hotspot mode for streaming the video. Due to the limited range of 2.4GHz Wi-Fi, the Quality-of-Service (QoS) progressively gets worse when the robot moves further away from the receiving computer.
This project aims to fixes problem by dynamically adjusting the video quality in realtime. Over UDP we can obtain estimates of QoS using RTCP packets received from the receiver. These RTCP packets provide helpful QoS information (such as RTT and packet loss) which can be used for automatically changing the bitrate and resolution of the video delivered from the sender.
Running the Code
Hardware
All the following instructions are for installing APStreamline and APWeb on the CC. A Raspberry Pi 2/3/3B+ with the latest version of Raspian or APSync is a good choice. Intel NUC's are excellent choices as well.
Do note that the Raspberry Pi 3 and 3B+ have very low power Wi-Fi antennae which aren't great for video streaming. Using a portable Wi-Fi router like the TPLink MR-3020 can dramatically improve range. Wi-Fi USB dongles working in hotspot mode can help as well.
Installing APStreamline
Install the gstreamer dependencies:
sudo apt install libgstreamer-plugins-base1.0* libgstreamer1.0-dev libgstrtspserver-1.0-dev gstreamer1.0-plugins-bad gstreamer1.0-plugins-ugly python3-pip
Install meson from pip and ninja for building the code:
sudo pip3 install meson

sudo apt install ninja-build
Navigate to your favourite folder folder and run:
git clone -b release https://github.com/shortstheory/adaptive-streaming

meson build

cd build

sudo ninja install # installs to /usr/local/bin for APWeb to spawn
On the Raspberry Pi, use sudo modprobe bcm2835-v4l2 to load the V4L2 driver for the Raspberry Pi camera. Add bcm2835-v4l2 to /etc/modules for automatically loading this module on boot.
Installing APWeb
The APWeb server project enables setting several flight controller parameters on the fly through the use of a Companion Computer (e.g. the Raspberry Pi). We use this APWeb server for configuring the video streams as well.
Clone the forked branch with APStreamline support here:
git clone -b video_streaming https://github.com/shortstheory/APWeb.git

cd APWeb
Install libtalloc-dev and get the MAVLink submodule:
sudo apt-get install libtalloc-dev

git submodule init

git submodule update
Build APWeb:
cd APWeb

make

./web_server -p 80
In case it fails to create the TCP socket, try using sudo ./web_server -p 80. This can clearly cause bad things to happen so be careful!
Usage
Video livestreams can be launched using RTSP. It is recommended to use RTSP for streaming video as it provides the advantages of supporting multiple cameras, configuring the resolution on-the-fly, and recording the livestreamed video to a file.
APWeb
Start the APWeb server. This will serve the configuration page for the RTSP stream server. Connect to the web server in your favourite web browser by going to the IP address of the Companion Computer.
On navigating to the new video/ page, you will be presented with a page to start the RTSP Server:
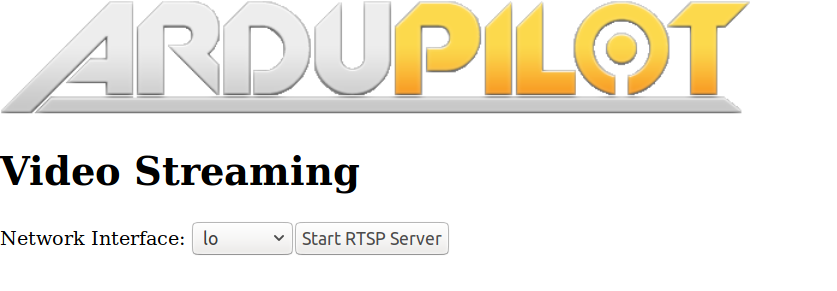
On selecting the desired interface and starting the RTSP Server, the APWeb server will spawn the Stream Server process. The stream server will search for all the V4L2 cameras available in /dev/. It will query the capabilities of all these cameras and select hardware encoding or software encoding accordingly. The list of available cameras can be refreshed by simply stopping and starting the server.
From here, the APWeb page will display the list of available RTSP streams and their mount points:

The video quality can either be automatically set based on the available network bandwidth or set manually for more fine-grained control.
The APWeb page also presents an option to record the video stream to a file on the CC. For this the video stream must be opened on the client. This works with any of the manually set resolutions but does not work with Auto quality. This is because the dynamically changing resolution causes problems with the file recording pipeline. An exception to this is the UVC cameras which can record to a file in Auto mode as well.
The RTSP streams can be viewed using any RTSP player. VLC is a good choice. Some GCS such as QGroundControl and Mission Planner can also stream video over RTSP.
For example, this can be done by going to "Media > Open Network Stream" and pasting in the RTSP Mount Point for the camera displayed in the APWeb configuration page. However, VLC introduces two seconds of latency for the jitter reduction, making it unsuitable for critical applications. To circumvent this, RTSP streams can also be viewed at lower latency by using the gst-launch command:
gst-launch-1.0 playbin uri=<RTSP-MOUNT-POINT> latency=100
As an example RTSP Mount Point looks like: rtsp://192.168.0.17:8554/cam0. Refer to the APWeb page to see the mount points given for your camera.
Standalone
Launch the RTSP stream server by running:
stream_server <interface>
The list of available network interfaces can be found by running ifconfig. Streams can be connected to using gst-launch.
Things to Try Out
-
Use a variety of different cameras and stream several at the same time
-
Try recording the live-streamed video to a file on the CC
-
Play with the Auto quality streaming feature on different types of network interfaces